Setting up deadlines for migrations has become a popular trend in the web analytics industry. While I find this philosophically amusing, my technical side insists on thorough testing before proceeding.
Shopify has announced two deadlines for migrating to their new checkout solution called ‘Checkout Extensibility’, here is their announcement:
August 13, 2024: Deadline to upgrade your Information, Shipping, and Payment pages.
August 28, 2025: Deadline to upgrade your Thank you and Order status pages, including your apps using script tags and additional scripts.
If you are a Shopify Plus user, you need to craft a well-structured migration plan to ensure that transitioning to this new setup does not disrupt any site tracking or media targeting configurations. Rushing into this migration without careful planning and measurement can lead to significant data loss.
In this article, we focus on best practices for implementing GA4 ecommerce tracking with Checkout Extensibility.
What is Shopify checkout extensibility?
First of all, what is checkout extensibility for Shopify Plus?
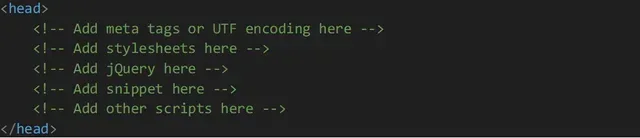
To date, the checkout pages in Shopify are hosted either in theme code (if you are a standard Shopify user) or in one of the theme files called checkout.liquid (If you are a Shopify plus user). Either way, you have full flexibility to customize the checkout flow and integrate any third-party functionalities within the theme code.
Checkout Extensibility is a replacement for the checkout.liquid file. This upgrade allows Shopify Plus users to set up checkout pages more easily and quickly while benefiting from enhanced security measures. Instead of handling customizations within the checkout.liquid file, any additional code should be added to "custom pixels." Each custom pixel functions as an iframe that hosts custom JavaScript snippets.
Yup, we said the bad word in web analytics world: ‘iframe’…
How does GA4 tracking work with Checkout Extensibility?
In short, any third party code snippet, including GTM snippet and dataLayer code, in the checkout section must be added in a custom pixel. This leads to three obvious questions:
- How do we push dataLayer based on the ecommerce actions such as begin checkout and purchase?
- What will the ULR look like by default?
- How do we QA these ecommerce tracking setups? (We will write a separate blog to answer this question)
Let’s start by walking through the process of adding GTM snippet before we answer these three questions.
Adding a GTM snippet in Shopify & setting up GA4 tracking
1. Create a custom pixel in Shopify
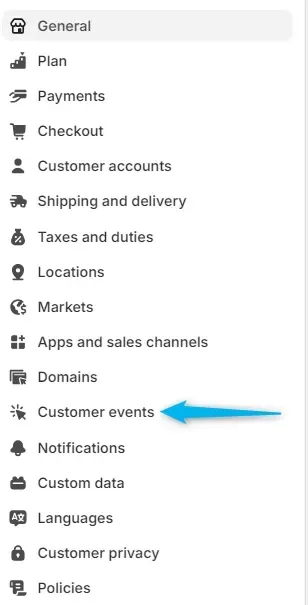
To create a custom pixel, go to ‘Settings’ in bottom left corner in your Shopify Plus’s Admin interface. Then select ‘Customer events’.
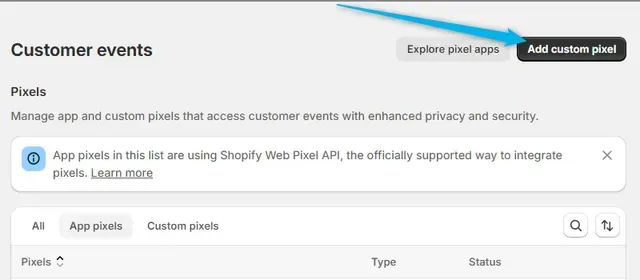
All your custom pixels and integrated apps will show up in the list under the ‘Custom pixels’ tab. Select ‘Add custom pixel’ on top right, a pop-up window will prompt you to add a name for your pixel. Give it a sensible name such as ‘GTM and dataLayer’ and hit ‘Add pixel’ button.
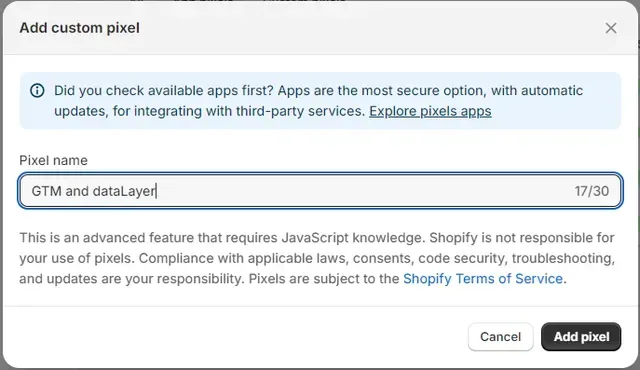
After this, you will see a code editor under ‘code’ section, you can start writing your Javascript code for your new custom pixel here. You can use this custom pixel to handle all your GTM stuff for the final few pages of the checkout journey.
2. Install GTM in the checkout section
Similar to how you would install GTM in a standard iframe on a website, you should install GTM within this custom pixel.
To do this:
1. Define dataLayer and set it to global level
window.dataLayer = window.dataLayer || [];
function gtag(){dataLayer.push(arguments);}
2. Paste the GTM installation code below the dataLayer definition:
(function(w,d,s,l,i){w[l]=w[l]||[];w[l].push({'gtm.start':
new Date().getTime(),event:'gtm.js'});var f=d.getElementsByTagName(s)[0],
j=d.createElement(s),dl=l!='dataLayer'?'&l='+l:'';j.async=true;j.src=
'https://www.googletagmanager.com/gtm.js?id='+i+dl;f.parentNode.insertBefore(j,f);
})(window,document,'script','dataLayer', 'GTM-XXXXXXX');
Note: Make sure you remove the GTM snippet from the theme code that covers these two pages or any other integrations. For the checkout pages, this should be the only time you insert GTM snippet.
3. Install GA4 ecommerce dataLayer
Now let’s address the first question: How do we push dataLayer base on the ecommerce actions such as begin checkout and purchase?
There are two options of adding dataLayer into Checkout Extensibility section:
- Subscribe to Shopify Plus’s reserved ecommerce action functions and push dataLayer in Custom Pixel code itself;
- Use a third-party app to push the dataLayer for you.
In this article, we pick the first option, which gives you much better control over the dataLayer syntax in-house and allows for any future custom dimension changes.
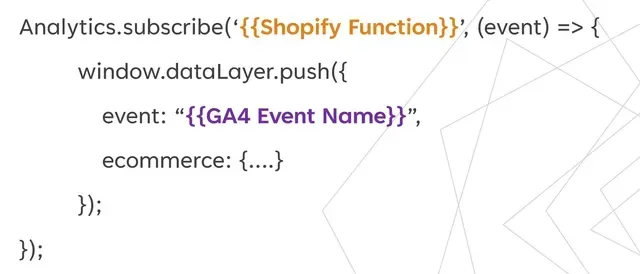
Shopify provides a range of built-in handlers that you can subscribe to with your custom code. For example, if you need some code to run when a customer reaches the order confirmation page, you can add your code to the ‘checkout_completed’ subscription, this allows you to push your dataLayer for the purchase event. Here is an example of how this code might look:
Shopify provides all the necessary actions for GA4 standard ecommerce events. Here is the full list of these actions:
These actions correspond to the standard ecommerce events used by GA4, allowing you to track key interactions and transactions throughout the customer journey.
The principle is to use the {{Shopify Function} } name within the subscribe argument of this code and map your {{GA4 Event Name}} to push it into your dataLayer:
Many third-party plugins offer to push dataLayer to Shopify or even implement GA4 for you. However, there are a few issues with this approach: 1) It often costs money; 2) Some plugins use outdated UA syntax instead of Google’s latest GA4 syntax; 3) Adding custom dimensions is typically more straightforward when handled directly in your custom pixel code rather than through a third-party tool.
4. Implement virtual page_view for your purchase event
Now let’s answer our second question: What will the ULR look like by default?
By default, each custom pixel creates a unique URL when an online user reaches the final order confirmation page. If you use the custom pixel without modifying the URL, you might see URL paths like this in GA4:
https://www.mywebsite.com/wpm@1a23b4c5d6e7f8g12345/custom/web-pixel-12345678/sandbox/modern/checkouts/cn/asdfghjkl123456789&locale=en-US&skip_shop_pay=prompt_allowed
These URLs differ from what users see in their browsers and are also not user-friendly. They create unique page URL rows for individual orders in GA4. Moreover, the last few pages within Checkout Extensibility is effectively an SPA that includes multiple ‘pages’ in the checkout journey.
Therefore, it is beneficial to fire a virtual page_view event within the ‘checkout_completed’ function. To achieve this, push a dataLayer such as below and then create a page_view tag for order confirmation in GTM. You can create a clean order confirmation URL by overriding page_location using a dataLayer variable. Here is an example:
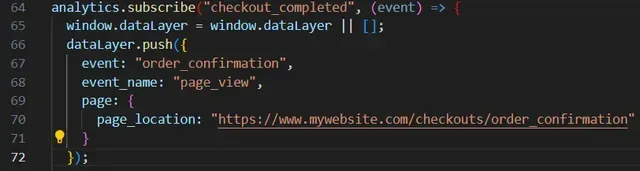
After that you can create a page view tag using a custom event trigger to send an extra page view event for order confirmation page.
Finally, to map your ‘purchase’ event with this new virtual page url, in your GTM purchase event tag, add page_location in your GTM purchase event tag using the variable from this dataLayer.
This setup ensures that your GA4 reports reflect a clean and user-friendly order confirmation URL and accurately map the purchase event to this virtual page.
I hope this guide helps you get started with your GTM/GA4 setup in Checkout Extensibility. We’ve left out a few details and plan to cover additional topics in upcoming blogs, so stay tuned for more content on Hookflash’s site on:
- How to QA GA4 tracking in Shopify Plus’s Checkout Extensibility
- How to handle Consent Mode with Shopify
If you need assistance with any part of this guide or setting up GA4 tracking with Checkout Extensibility, don't hesitate to reach out to us at Hookflash. We're here to help you navigate the intricacies of ecommerce tracking and ensure your site analytics are spot on.


